Table of Contents
Do you know secure Shell (SSH) connections would work from a Windows-native program? SSH commands communication works just fine inside a Windows’ PowerShell window, as OpenSSH has been integrated into Windows 10 back in 2018.
You can check the OpenSSH client is installed or not:
PS C:\> Get-WindowsCapability -Online | ? Name -like 'OpenSSH.Client*'

Name  : OpenSSH.Client~~~~0.0.1.0
State : Installed
If not (State: Not Present), you can install it using the following PowerShell command:
Add-WindowsCapability -Online -Name OpenSSH.Client*Create a SSH Key Pair for SSH Authentication
1️⃣ First launch a PowerShell window. Inside PowerShell, run the ssh-keygen command. The -t parameter tells OpenSSH what type of SSH key should be created. Here we go with the rsa type.
ssh-keygen -t rsaGenerating public/private rsa key pair.
Enter file in which to save the key (C:\Users\admin/.ssh/id_rsa):
Enter passphrase (empty for no passphrase):
Enter same passphrase again:
Your identification has been saved in C:\Users\admin/.ssh/id_rsa
Your public key has been saved in C:\Users\admin/.ssh/id_rsa.pub
The key fingerprint is:
SHA256:VW5ljf///nCFNw6ts450VISE/F+hx9dlgvtY9xZW1E0 admin@win11
The key's randomart image is:
+---[RSA 3072]----+
| . +o+*E|
| =.++.B|
| . +.o==|
| . ..o+**|
| S *=+O|
| o =o*|
| . +.oo|
| . o oo.|
| ..o .*|
+----[SHA256]-----+This results in a new folder named .ssh in your own user folder. Inside that folder, two files have been created:
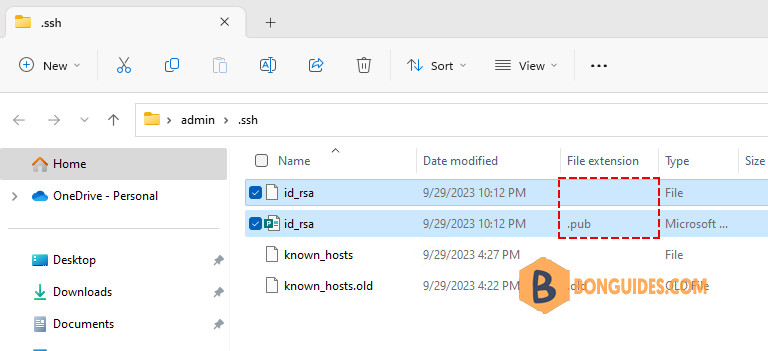
The difference between the two is the file extension (which is not shown by default in Windows Explorer).
- The id_rsa file without extension is the private key – which you should guard like your own wallet. It can also be password-protected (as prompted in the ssh-keygen command above).
- The id_rsa.pub file is the public counterpart of your private key. It needs to be installed on the target server(s) where you want to login using SSH.
Launch SSH agent (optional)
A SSH agent is a small program which runs in the background and loads your private key with the password into memory. This allows to use the ssh command without always having to enter the passphrase again.
You can check whether the service is already running or not:
PS C:\> Get-Service ssh-agent

Status   Name               DisplayName
------   ----               -----------
Stopped  ssh-agent          OpenSSH Authentication Agent
Then enter the following commands in the administrator PowerShell window:
Get-Service ssh-agent | Set-Service -StartupType Manual
Start-Service ssh-agent
Get-Service ssh-agent
Status Name DisplayName
------ ---- -----------
Running ssh-agent OpenSSH Authentication AgentThe ssh-agent is now running. use ssh-add to load your own private key into the SSH agent:
ssh-add $env:USERPROFILE\.ssh\id_rsa#Output
Identity added: C:\Users\admin\.ssh\id_rsa (admin@win11)Install the public key on the remote server
1️⃣ Remember the mentioned public key? Now it is time to look at the contents. Using the Windows Explorer, navigate to your .ssh folder. Or you can use Get-Content cmdlet to get its content.
Get-Content $env:USERPROFILE\.ssh\id_rsa.pub2️⃣ Open the id_rsa.pub file with a text editor. Notepad will do. This shows the content of the public key, which is a long line of a text:
ssh-rsa AAAAB3NzaC1yc2EAAAADAQABAAABgQC5786CyQZizFqWs/YLCOFcougR1wZBG2yHFjswSACeJMO8DV3lGPjmOXMLf5z2QQy1mZHUW7t9J7EWzDj54lr7VNd+CwW2Jo0inRAP3+IzxcELwYBwJmfSj+KbWMsJF7Q8zden4t8G1jlFXE1Md8O3JUH4MyM4W7Ze9QmOy1fp8OftCyx4LPTWgbC1eqtwmck5AZgrfa8039E61LH+dKapcvgj5DgAE8Kco8zg/2RZBGrRWfa8FANr3fcfdaFN0mH3xQpcgO8/EfJhzTDmBVlFa2I5pkAFHHMvjcSWzK9fUzTIaPYWm+nNTQl/KSuW1kZi3sVfzcfCXEkUrCKAqc1OOQK8nvCm4578yCpb0gS6ge/VLGp5ZpUeOsvtN0JckGT6MBSr7VfheVABueflCm/hj9Nmouvf/oQfdjs4g+too99+ZJpIv6IWJHY4Kd2HettwnvwCam97KaEKEvIpyTQTjMhnQXPCKsPAk2sqH1VM9CwfyPfDoHZv4XqBLK3j+QM= admin@win113️⃣ SSH to the remote server. This time, you still need to use password authentication.
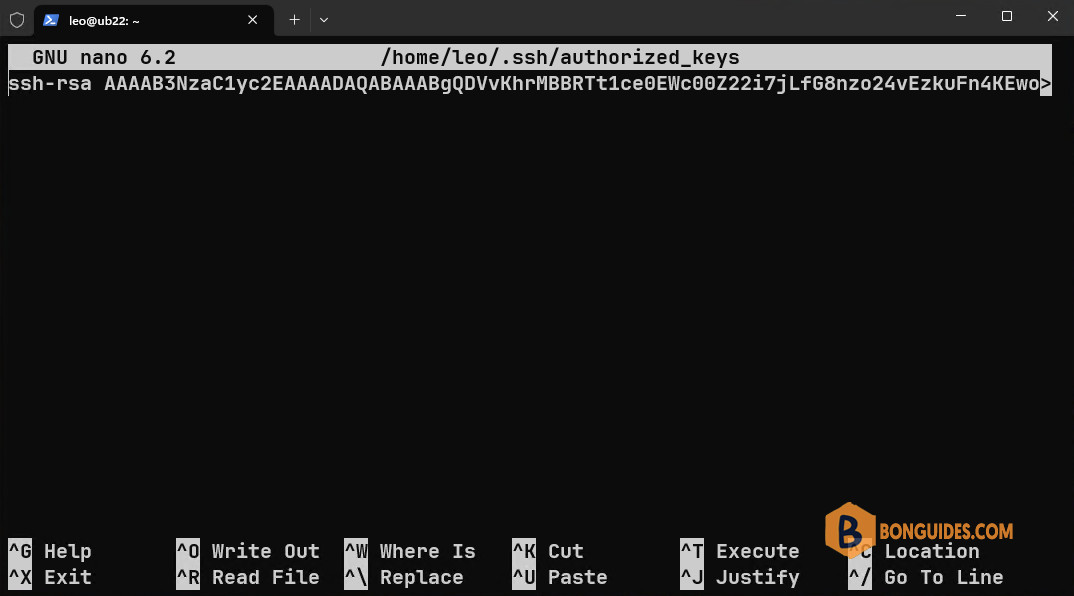
4️⃣ Create a new file named ~/.ssh/authorized_keys on the remote server using your favorite text editor.
mkdir ~/.ssh
nano ~/.ssh/authorized_keys5️⃣ Copy content of the public key from notepad to the newly created file.
6️⃣ Check then enable public key Authentication if it not enabled yet. The settings for OpenSSH server is located in /etc/ssh/sshd_config.
sudo nano /etc/ssh/sshd_config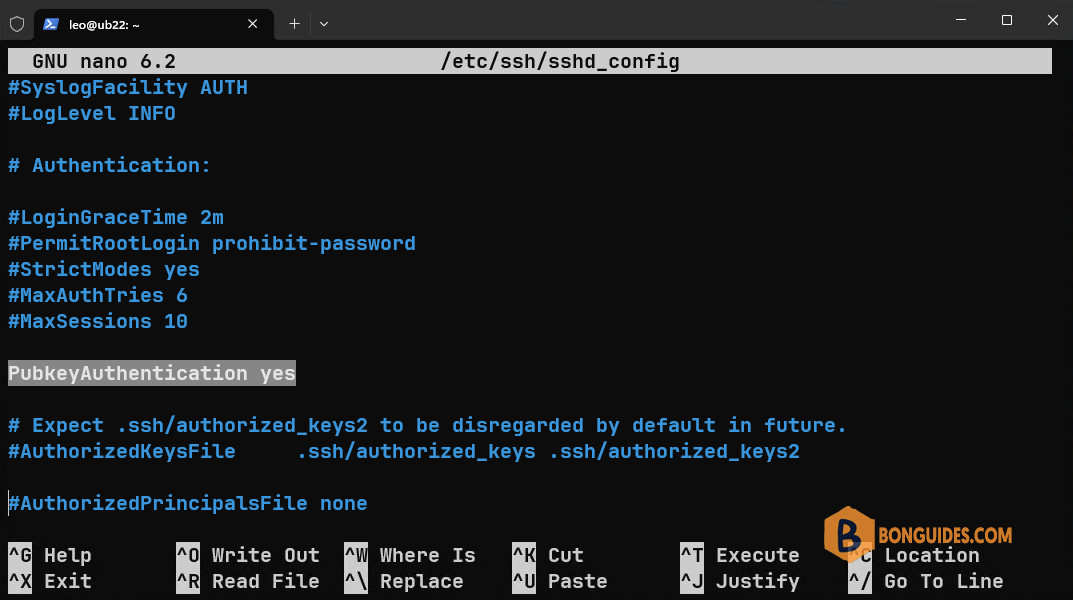
7️⃣ Finally, restart the SSH service.
sudo systemctl restart sshConnect to a remote SSH server
Now that we have created a key, enabled ssh agent and placed the public key on the target server, we can initiate a ssh connection.
#Connect without ssh-agent
ssh [email protected] -i C:\Users\admin\.ssh\id_rsa
#Connect with a private key id loaded using ssh-agent
ssh [email protected]Another often used optional parameter is -p. It defines a different SSH port (default is 22).
ssh [email protected] -p 2222 / ssh [email protected]:2222If this is the first time you are connecting to a remote server, ssh will prompt you to verify the remote host’s fingerprint. You can do so by entering yes at the prompt.
The authenticity of host '10.10.6.22 (10.10.6.22)' can't be established.
ED25519 key fingerprint is SHA256:DFhYvYIS0O+SNI53un5Cbn4WB3YbxP6USGKbSp/XPEA.
This key is not known by any other names
Are you sure you want to continue connecting (yes/no/[fingerprint])? yes
Not a reader? Watch this related video tutorial: